mickmel
  • Blog
  • About
    • Tools
  • Speaking
  • Podcast
  • Contact
  • Search

My favorite smart watch right now is… Pebble?

September 19, 2017 by greenmellen Leave a Comment

Reading Time: 3 minutes

I should have seen this coming after my blog post about Android Wear 2.0 back in February, but I’m in love with my “new” old Pebble watch. As I mentioned back then, I really just wanted a dumb smartwatch — so I’d want it to send me some notifications, maybe let me archive some emails, and that’s about it. If it’s any more involved than that, my phone is literally already on my body or on my desk.

Android Wear vs Apple Watch

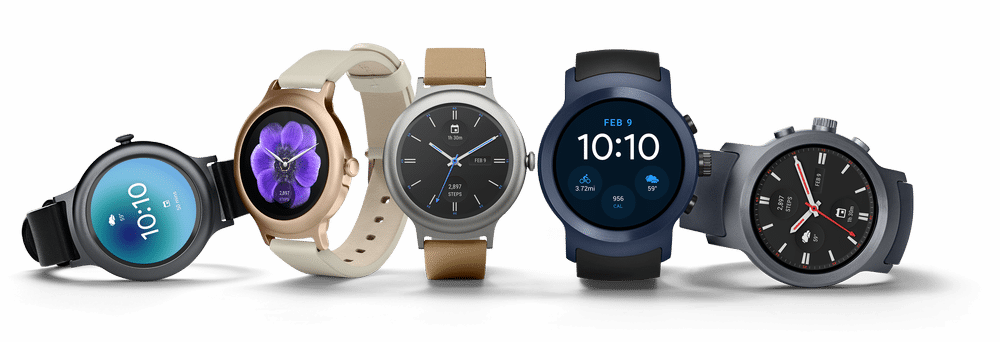
The promise of Android Wear was great — a simple interface to get notifications from your watch. Apple went the other way, with lots of apps and bells and whistles. For me, Android Wear seems like a much better solution.

The first version of Android Wear was great, though a bit buggy. With Android Wear 2, I had hoped for a smoother experience, but instead they started chasing Apple and added a bunch more features that I really don’t want — without fixing the bugs.

Pebble smart watchBack to Pebble

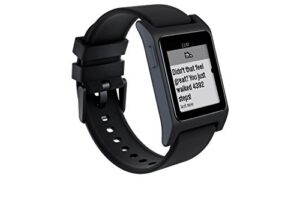
I can’t remember what drew me to dig the old Pebble out of the closet, but that’s what I did a few weeks ago. The battery was long dead, and then it needed some software updates, but when I got it going I was amazed — it was perfect.

The notifications are instant. I can archive Gmail from my phone. I can offer simple replies to text messages. I can decline phone calls. And that’s about it. There’s not a bunch of apps from my phone trying to weasel their way on. There is a Pebble app store, but I’m essentially avoiding; it’s far less-stocked than the similar stores for Android Wear and Apple Watch, but my goal here is to avoid that stuff.

Pebble is dying

That said, the future is very grim for Pebble. They were acquired by Fitbit in late 2016, and have since stopped production on all of the Pebble watches. You can still buy them on Amazon, and the prices are great. I’m thinking the Pebble 2 se is the best bet, and it’s only $55.

I was hopeful that Pebble and Fitbit might do something awesome together, and perhaps eventually they will, but the Fitbit Ionic is the first device that has come from their pairing, and it’s exactly what I’m trying to escape. It looks great and has a ton of features — but it has a ton of features.

Because Pebble is essentially dead, they’re not promising long-term support for their old watches. I believe they’re promising support through the end of 2017, but that’s it. They’ll presumably leave the app online for a while, but future updates to Android will eventually make it worthless. I hope Android Wear gets their act together by then, or something else compelling comes along.

rebble.io

In theory, I might be saved by the rebble project. It’s a team of developers working to build alternate firmware for Pebble devices to keep them going longer. However, that project seems quite stagnant and likely won’t be a long-term solution.

My Moto 360 is a great-looking watch (certainly better looking than the Pebble), so perhaps I’ll go back to it eventually. For now, though, I’m rocking the old Pebble and loving every minute of it.

Filed Under: Mobile, Technology

My new morning routine

July 31, 2017 by greenmellen Leave a Comment

Reading Time: 4 minutes

A few weeks ago I was inspired by an episode of the Contactually podcast to work on setting a more focused morning routine. As I began working on building a good routine, Adam Walker talked about a great app during this episode of the Tech Talk Y’all podcast called “Morning Routine”. That app is only available on iOS

buy stromectol online stromectol online

(how is that possible in 2017?), which was unfortunate. However, after some digging I found an app called Tinygain (available on both iOS and Android) that does essentially the same thing but with some nice added features.

I’ve been test driving and tweaking my morning routine in preparation for today, the first day of school for my two girls (yes, it’s July 31 and it’s the first day of school here in Georgia). While I’ll continue to adjust as time goes on, it’s come together nicely and takes roughly 40 minutes as I start my day.

I still don’t drink coffee in the morning, so I just get up, grab a glass of water, and get to work.

Email (2 min)

I intentionally keep this short, but I do a quick glance to make sure there are no fires to put out. Since I typically go to bed with an empty inbox, there’s usually only a handful of junk in there by the morning. I delete the junk, save other tasks for later, and then I can attack the rest of the routine without having the “what if there’s an emergency email?” in the back of my mind.

Tinygain

Next, I fire up Tinygain. It walks me through the rest of the routine with the pieces I’ve set up in there.

Morning power questions (2 min)

Tinygain has a lot of “routines” available that you can add, and “morning power questions” is a good one to help start the day. It just walks through a few simple questions so you can begin to frame your day:

  1. What do I have to look forward to today?
  2. What’s absolutely perfect about my life?
  3. How can I make today absolutely awesome?
  4. What is the best thing that could happen today?

I may adjust the questions a bit over time, but that’s how they came and it’s a solid way to start.

The five minute morning journal (4 min)

Next is another pre-built routine called “the five minute morning journal”. It asks somewhat similar questions, but encourages you to write them down. I use journey.cloud to store them, but you could use any app or even just a pen and paper.

  1. Write down three things you are grateful for.
  2. Write down three things that would make today great.
  3. Describe how well you slept last night. If you remember any dreams, write them down.
  4. What is the one thing you want to accomplish today?
  5. Write whatever is on your mind right now.

My custom routine

Lastly I dig into my custom routine that I built into Tinygain. Most are simple slides, but I have a timer on one of them.

Feedly (4 min)

I go through my Feedly, save items to read for later, and just work it down to zero. Feedly tends to stay fairly quiet overnight (but crazy during the day), so I like to make sure I’m at a fresh start.

Bible (8 min)

I’m working through a one-year Bible, so each day is roughly a 8-10 minute read. Each day is a passage from the Old Testament, the New Testament, Psalms, and Proverbs.

Brainscape (10 min)

Studying Brainscape can be open-ended, so I set a 10 minute timer on it in Tinygain. I try to study more throughout the day/evening as time allows, but this makes sure that I at least get a little time in there in case the day gets crazy.

I’ve also discovered that the Brainscape iOS app has some new features that aren’t yet in the web version or on Android. One is called “smart study” (to go through all of your subjects at once) and the other is called “random mix” to go through all of the decks within a given subject at once. They’re killer features, and should be coming to Android and the web later this year. In the meantime, I’ve taken over an old iPod Touch from my daughter (she has an iPhone now, so she’ll be ok) and I’ve wiped everything from it except for Brainscape. It works quite well.

Because Brainscape syncs between devices, I can use that iPod Touch for the morning session, but still use my Pixel or the Brainscape website to study at other points during the day.

Cloze (3 min)

Next I visit Cloze to see who it thinks I need to get in touch with today. It usually gives me 2-4 people, and I often only choose to reach out to one of them with a quick email.

Birthdays / Special wishes (3 min)

I hit the Facebook birthday list and the LinkedIn notifications and reach out to a few people. I don’t necessarily reach out through those platforms (“happy birthday” wishes on Facebook get buried), but it’s a good place to see who is celebrating today.

High fives (4 min)

The last piece is what the Contactually podcast called “high fives”. The speaker said he hits his major social channels and tries to like/comment on five things on each. I don’t use the rule of five, but I try to go to my Facebook, Twitter, Instagram and LinkedIn feeds and interact with a few folks.

As with other items on this list, I try to do this a bit throughout the day, but some days get hectic and I don’t get back, so this ensures that I’ll at least talk to a few people on there.

That’s it!

It’s a fairly long list, but Tinygain helps me to walk through it fairly quickly. After this is breakfast with the family, typically a short workout, then shower and off to work.

Do you have a set morning routine? What am I missing from mine?

Filed Under: Business, Learning, Productivity, Social Media, Technology

Anki vs Brainscape

July 23, 2017 by greenmellen Leave a Comment

Reading Time: 4 minutes

I’ve been a heavy user of Anki for a few years now, and it’s changed my life quite a bit. This post from late 2016 explains it quite well

buy nolvadex without prescription
purchase arava online

, and you should probably read that first if you’re not familiar with Anki and these kinds of learning systems.

Earlier this year I dug into Tinycards, but I was fairly unimpressed and Anki was still tops for me. However, over the past few weeks I’ve been playing with Brainscape quite a bit and now I’m making the switch away from Anki.

They’re very similar systems; in both cases you can download or create your own decks (including text, images, sound, etc), and then review the flashcards (with varying algorithmic “spaced repetition systems”) to begin to learn them.

Why switch?

It was a tough decision to switch over, as there are some things I prefer with Anki. In particular, while Brainscape’s algorithm is great for many kinds of learning (here is a bit about their algorithm, and this white paper goes very deep into it), Anki’s is better for others. I kind of wish I could combine the two systems; I even considered using both side-by-side for different kinds of content, but decided that was overkill.

Another thing I like about Anki is the tagging system it uses. I can have one card with multiple tags, so I can view it in different scenarios (such as people that I know from our #meetup, but also might be a #client). Brainscape forces each card into their own deck, so I’ve had to decide where to put certain cards.

Lastly, Anki wins on price. It’s free for most systems (and $25 on iOS), whereas Brainscape pricing goes from $9.99/mo up to $79.99 for lifetime. For me it’s a pretty easy call to just spend the $80 and have it forever, and their pricing is certainly affordable, but Anki is certainly lower priced.

Where Brainscape wins

All of the above items aside, I’ve found Brainscape to be a better solution for me, for reasons such as:

Look and feel

Anki works well, and that’s the most important thing, but Brainscape just feels so much better. Anki feels like Windows 98, whereas Brainscape feels like a modern app.

Sharing

This was a big one for me. While you can share decks in Anki, you’re really just giving a copy to someone. If you make changes, they don’t see them. With Brainscape, you can truly share decks and continue to refine them. For us, this means we can have a few GreenMellen-focused decks (clients, messaging, etc) and always be tweaking them for the team.

Available decks

While Anki has a large collection of user-generated decks, Brainscape seems to have many more. Further, because Brainscape is a paid service they’re able to create quite a few “official” decks that are nicely curated. In particular, their knowledge rehab set (consisting of 33 decks and 2099 cards) is an awesome way to improve your general knowledge. Below are some of their available subjects; some are available to everyone, and some are locked to premium users only. Once you’re a premium user, though, every deck is available (no one-off purchases required):

Open-ended study

I went back and forth on which method I prefer on this, and there are advantages to each, but I’m liking Brainscape’s open-ended study method more than Anki’s strict repetition system.

  • With Anki, you have a set number of cards to review each day, based on the calculated “spaced repetition” that you need to see them with. I kind of liked knowing I needed to review x cards each day, as it gave me a goal. However, studying extra was kind of a pain and seemed to be discouraged by the app.
  • With Brainscape, it’s more open-ended. You’re always trying to get to 100% “mastery” of each subject, but that’s it. If you want to study for 10 minutes or three hours, that’s up to you. You can see in the screenshot below some of my various subjects on the left (with the gray bar showing mastery of each) and then the mastery level of each deck inside of “Knowledge Rehab” in the center.

My only wish is that Brainscape would add some kind of “decay” feature, or something to slowly lower mastery over time. If I study a subject hard and get 100% mastery, that’s great. A year from now, though, I certainly will have forgotten parts of it. Brainscape says you should simply review subjects periodically, but something that automatically slowly diminishes the mastery score over time would really help.

Final Thoughts

At the end of the day, you can’t go wrong with either. I’m on board with Brainscape now, and I’m hoping to drag some GreenMellen colleagues with me. If you prefer Anki, I can totally see that too.

If you’re wanting to dig into Brainscape, here are a few video tutorials on Brainscape to get you started.

Do you use a system like Brainscape or Anki? Which system works best for you?

Filed Under: Business, Learning, Technology

Mechanical keyboards are complex, but awesome

April 11, 2017 by greenmellen Leave a Comment

Reading Time: 2 minutes

Last week I got an itch to dig more into mechanical keyboards. For those that don’t know what a “mechanical keyboard” is, they’re essentially the loud “clicky” keyboards you’ve seen in the past, and they’re amazingly popular. People are often able to type more quickly and accurately on them, which can add up to big savings across our millions of keystrokes every year.

As I dug in to learn more, I discovered that there are a lot of different options out there — and not just in terms of manufacturers. While all mechanical keyboards sound a bit “clicky”, those clicks come from a variety of different switch types. The most popular switches are the “Cherry MX” flavors, which come in black, red, brown, blue, green, and clear. Each color uses a different type of switch, so they each behave and sound a bit different. This Lifehacker article does a nice job of breaking them down.

After digging around for a while, I decided I wanted to try out the Das Keyboard 4 Professional. Das Keyboards are among the highest quality and most popular keyboards, so they seemed like a good place to start. That particular keyboard comes with either brown or blue Cherry MX switches in them. The blues are very clicky and quite popular, but the browns are a bit quieter — a smart move in an office environment.

Before I ordered, I decided to take it a step further and get the Das Keyboard 4 Ultimate instead. The Ultimate is essentially the same as the Professional model, but with one minor difference. Check it out:

Yep, the keycaps are totally blank!

I’ll be honest; I went back and forth a while before I decided to go with the Ultimate instead of the Professional, but so far it’s been great. I knew that letters and numbers would be easy enough, but I was a bit worried about the other characters like ()*$#@. I’ve been surprised by how many of those I can hit by touch; I can’t tell you where they are, but when I need them my fingers go right to them. In fact, I just used this new keyboard to write this entire post.

I wouldn’t recommend the Ultimate to most people, but the Das brand of keyboards are great, and mechanical keyboards, in general, are quite awesome.

I encourage you to check out that Lifehacker article that I mentioned earlier to learn more.

Do you use a mechanical keyboard in your daily life?

Filed Under: Productivity, Technology

Bring an old computer back to life with CloudReady

March 6, 2017 by greenmellen Leave a Comment

Reading Time: 2 minutes

We have an old Windows “all-in-one” computer in our guest room that really doesn’t do much. It’s old, tired and slow. So a few weekends ago, I gave it a new lease on life with CloudReady. Total cost: $0.

CloudReady is free software that essentially turns any computer into a Chromebook. I told you about the Google Chromebox back in 2014 and the idea is similar; it’s a desktop computer running Chrome OS, but instead of buying a new machine for it you can just use one that you already have around.

Free?

It’s 100% legal and 100% free to use. Neverware, the company behind CloudReady, makes their money by helping schools and other organizations move their fleet of machines over to the software.

Installation

The installation process itself is quite simple. You download the software onto a flash drive, and then boot your old computer up from there. It will run directly on the flash drive, so you can make sure your old computer is compatible (most are, but not all of them). If it seems to work well, you can then install it directly onto the computer to make it run even faster. Some computers support dual-boot (choose to go to Windows or CloudReady when you boot up), but most require that you erase the old Windows software. We did that, and it works wonderfully well.

Chrome OS

The “catch” here is that you’ll be running Chrome OS, and not a full operating system like Windows or macOS. It has the same limitations as Chromebooks, primarily that you can’t download and install other software; everything needs to be web-based. In our case, we already have four Chromebooks in the house (along with the Chromebox at the office), so this is just another machine you can hop on to work on your stuff.

Try it out

If you have an 8 or 16GB flash drive laying around, give it a try! It’ll only take about a half-hour to load and test it out, then perhaps another half-hour to get it fully loaded. Here is the download page, which also has a link to their installation guide.

How many Chrome OS-powered computers are in your house?

Filed Under: Technology

A Chromecast on every TV

February 14, 2017 by greenmellen Leave a Comment

Reading Time: 2 minutes

I’m a big fan of Google products for two main reasons:

1 – In general, they’re pretty great products (Gmail, Maps, Docs, etc).
2 – They tend to work on every major platform.

Item #2 is why I encourage people to choose the Google Chromecast over Apple TV (or Amazon’s Fire Stick) when looking for a streaming device. We have one on every TV in our house, and it’s the primary tool we use on the TV in our office.

What is Chromecast?

If you’re not familiar with Chromecast, this video from Marques Brownlee does a good job of showing how it works:

Note that his video is a few years old, and many other services are now compatible with it. As Marques explains, the beauty of Chromecast is that it doesn’t stream from your phone — your phone just tells it what to do and then Chromecast pulls the content directly from the internet. This makes for a very smooth experience and saves battery life on your phone.

Apple TV is kind of the opposite; it doesn’t do much on its own, and requires that your device constantly pushes content to it. This have some advantages, since there is no limit to the content you can push that way, but it has some downsides. Apple TV also only works on Apple devices, while Chromecast works on Apple devices, as well as Android and Windows.

What about the Amazon Fire Stick?

This is the one “catch” with Chromecast. Because Amazon has their own competing product, none of the Prime Video streaming content works with Chromecast. It’s not a shortcoming of the Chromecast, per se, but it’s simply that Amazon would prefer that you buy their device. If you need to have your Prime Video shows, the the Amazon Fire Stick might be a good choice. If you typically use other services such as YouTube, Hulu, Netflix, etc, Chromecast is the way to go.

For only $30, it’s a pretty easy choice to make.

How many Chromecasts do you own?

Filed Under: Entertainment, Technology

Digging into Android Wear 2.0

February 13, 2017 by greenmellen Leave a Comment

Reading Time: 2 minutes

Last week Google announced Android Wear 2.0, the first major upgrade to their watch software. Google wrote an in-depth blog post that covers all of the new features, and this video shows them off a bit:

Similar to the iPhone vs Android battle, Google released their watch first in 2014 (and Apple followed suit the following year), but then Apple made big improvements and Google is catching back up. Along with the new software, Google and their partners released a variety of new watches, some of which can be seen here:

buy super-kamagra online buy super-kamagra online

You can make good arguments that the Apple Watch is superior, but it’s hard to say that the Google watches aren’t better looking. Since my watch (the Moto 360 v2, seen in this post) is a getting a bit older, I’m considering one of the new watches. However, I’m not quite sold yet. It’s not that they’re bad watches, but I’m just not sure they hit what I need.

Dumb smartwatches

When I purchased the Moto 360, I did it with the full intention of having a “dumb” smartwatch. I wanted something that would show me notifications and let me ask questions, but I had no need for 4G integration or GPS. I have a running watch (and a phone) to handle those. With that in mind, I got the nice-looking Moto 360, but with a sweat-unfriendly leather band. It looks great and works great, and I have other hardware to use when I work out.

The new watches are now cramming more features into them. The new LG Watch Sport has NFC for payments, GPS, 4G and a heart rate sensor. All good things, but not really things I need. The other main watch they just revealed is the LG Watch Style — a simpler watch without some of those extra sensors and features. I’m more attracted to that one, but it’s not really much different than my current watch.

Keep them separate?

I’ve been on the wrong side of history with the “separate” argument a few times. I remember when Google Maps added turn-by-turn support; I thought it was a pretty neat (which it was), but I preferred to keep my phone and my Garmin GPS separate. Now virtually everyone, including me, uses their phone for turn-by-turn navigation in the car.

Perhaps I’ll eventually want a single watch to do everything, but for now I’m a fan of my “dumb” smartwatch. Android Wear 2.0 should be arriving on it in a few weeks, so I’ll still get the new interface and many of the new bells and whistles. This big push from Google will also see a bunch of additional new watches released later this year, so perhaps one of those will catch my eye.

If you had your choice, what would be the watch you’d most like to wear?

Filed Under: Health, Technology

The blogs I follow

January 16, 2017 by greenmellen Leave a Comment

Reading Time: 3 minutes

I mentioned a few years ago wrote about how I follow over 500 blogs every day. That post has the details of how I do it, but it really comes down to two things:

  1. Devote time to keep up with them.
  2. Have a system to help you out.

That older post will show you the system, and the time factor is up to you. I try to allow spots of time throughout the day to keep up with them, then some longer time each week to dig deeper into some of the more compelling posts.

Finding blogs

Once you have things set up you need to find some blogs to follow. Here are some ways to find items to add to your Feedly.

Icons
Look for the orange RSS icon, seen on the right. Clicking on that icon will typically lead you to the RSS feed of the site you’re currently on. While the feed itself will look ugly in your browser, you can copy the link to their feed and add it to Feedly.

Just Guess
The second best way is to simply guess. If you’re on a blog or news page of any kind, there is a 90% change of having an RSS feed behind it. Just copy the link to that page into Feedly and it will typically be able to find the feed for it.

Dig for one
There are many other custom feeds you can generate yourself. For example, WordPress sites automatically create separate feeds for each category of posts. Suppose you’re on the GreenMellen site and just want a feed of our SEO-related posts. Head over to this URL:
http://www.greenmellenmedia.com/category/seo-blog/

buy no insurance

Then just put “/feed” at the end of it, like this:
http://www.greenmellenmedia.com/category/seo-blog/feed/

In WordPress this also works for tag pages and author pages, though fewer blogs use those.

Another good example is with craigslist. If you’re on there, perhaps you want to keep an eye on any new antiques that are added. Start by browsing to that section, then look for the orange RSS button at the very bottom on the right.

Better yet, you can do a search on craigslist and get a feed for the search results. For example do a search for the hot NES Classic, and you’ll see that same orange RSS link at the very bottom.

I tend to only pull craigslist feeds occasionally, as you will typically have a lot of items pouring into your Feedly.

Start with mine

While I have around 550 sites in my Feedly, many of those are blogs that you wouldn’t be interested in (my local weather, blogs from our kid’s schools, some of our clients, etc), but there around 400 that might be worth considering. I’ve saved those into this OPML file for you download and add to your own Feedly. It’s full of hundreds of tech blogs that I’ve added over the years, with a few things to look out for:

Dead: Some of the blogs are certainly dead. I’m not sure which ones are, but it doesn’t matter — this is the beauty of RSS. You’ll simply never see any posts from them, so it’s not like they’ll really be in the way.

Crazy: Some of them in there are very busy; Lifehacker produces roughly a dozen posts per day, and sites like TechCrunch average almost 40/day. You may want to remove some of the busy ones like that so you can get a handle on things.

It takes effort to keep up with a large number of feeds, but it’s a great way to keep yourself informed without having to visit dozens of different sites every day.

What are some of your favorite blogs to follow?

Filed Under: Content, Technology

Security vs Convenience

January 11, 2017 by greenmellen Leave a Comment

Reading Time: 4 minutes

You’ve heard the phrase “you can never be too safe”, but it’s not true in every situation. A good example is driving; there are more than 30,000 driving-related deaths in the United States each year, but there is a very simple solution. Flood the streets with police, and lower the speed limit to 20 mph on every road, strictly enforced. The number of deaths would drop to nearly zero, but it’ll never happen. Why? People would never give up the convenience of getting places in a reasonable amount of time.

The same can apply to securing your technology — you want to keep things secure, but too much security can create headaches.

Anti-virus

A great example is anti-virus software. While things have changed in the past few years, traditional anti-virus software can be a huge resource hog on computers. It can make your computer run noticeably slower, costing you hours of productivity over the course of a year.

If you keep your computer updated, use a secure browser, get your email scanned for viruses (which most providers do) and don’t download any shady files, your odds of catching a virus are virtually zero. Further, some of the biggest security issues with computers in the past few years have been security holes in the anti-virus software itself (such as this issue with Norton). I’ve not used a true anti-virus program in many years and haven’t had any issues. However, it still may be wise to install it for your less tech-savvy friends and family members who might need the help or are more apt to click on misleading popups.

In either case, Microsoft’s “Windows Defender” is now baked into Windows 10 and does a nice job and Chromebooks are essentially virus-proof by design, so things are getting easier for everyone.

Backups

Whatever your use of anti-virus software is, you want to make sure that all of your stuff is reliably backed up. There are two main ways to do this:

  1. Keep it backed up using an Apple Time Capsule, an external hard drive, or a remote solution such as Carbonite.
  2. Keep all of your items in online accounts, so you can access them from anywhere and they’re essentially always backed up.

I work with option 2, which I’ll explain below, but option 1 is perfectly fine depending on how your life is structured.

Secure your accounts

With item number two above, the big issue these days is controlling access to your various accounts. In my case, I typically use at least six different devices in any given week; a desktop at home, a desktop at work, a Windows laptop, a Chromebook, phone and tablet. Having access to all of my tools everywhere I go is great, but if a hacker were to gain access of one of my accounts it would be killer.

Like many people, my most important account is with Google. This has my email, calendar, contacts and all of the stuff I save in Google Drive and Google Keep (as discussed here).

Google, like most major online services (Dropbox, Facebook, etc), allows you to set up two-factor authentication. They explain it here, but it essentially requires that you provide your password and prove that you have your phone with you (by entering a code) before you can log in. The logic is that even if someone gets your password, they’re unlikely to also have your phone (and vice-versa).

Going back to the beginning of this post, you have to weigh the “security vs convenience” of two-factor authentication. I’ll be honest, it can be a pain sometimes. You just want to log in, but now you need to dig out your phone and get a code. However, on this one I’ll push you to set it up anyhow. While the threat of desktop viruses is waning a bit, online hacking is only getting worse. Losing your Google/Facebook account would be killer for many of us, and this is worth taking the time to do.

A great example is the case of the Democratic National Committee hackings near the 2016 US Presidential elections; a major factor was that chief Hillary Clinton advisor John Podesta didn’t have two-factor authentication set up on his email. That alone would have helped prevent that entire mess. Just do it.

Securing your phone

The biggest problem I see lately in the “security vs convenience” debate is PIN locks on cell phones. Do you have one on yours? Studies show that 30-50% of cell phones have no lock on them at all. If they’re stolen, the thief has full access to everything on the phone. It seems like an easy to decision to put a password/PIN on your phone, but with the average person checking their phone 85 times/day, entering that PIN becomes a pain very quickly which is why many people don’t want to mess with them.

So what’s the solution there? Part of the solution might come from your smart watch. While Android and Apple handle things a bit differently, both allow you to keep your phone unlocked if it’s in range of the watch, but have the password show up if no watch is around. This means that you don’t need to deal with a PIN in your day-to-day life, but if your phone is stolen or lost in a taxi, no one else will be able to access it.

In the case of Android, you can add other “trusted devices” and “trusted places” to keep your phone unlocked.

Trusted devices are things such as your watch or the bluetooth connection in your car.

Trusted places are GPS-based locations, such as your home or office.

If your device is in a “trusted” situation, it’ll unlock with no PIN. If not, then the PIN shows up.

With 2.1 million phones stolen last year in the US, it’s crucial that you make sure your phone is protected — even if it’s less convenient to use.

How do you make sure your stuff is secure without causing unnecessary headaches?

Filed Under: Productivity, Technology

Manage your email more easily with Shift

January 10, 2017 by greenmellen Leave a Comment

Reading Time: 2 minutes

Not long ago, I told you that I made the switch from Gmail to Google Inbox. I may or may not switch back to Gmail at some point, but whatever I decide to do I’ll probably do inside of Shift.

Shift is a desktop application (for Windows, Mac and Linux) that puts your Gmail or Google Inbox (or Outlook) inside of their container. This frees up some tabs on your desktop, and also adds a few other nice features that I’ll share below.

Here is a quick animation showing some of what it does:

Google Inbox is great because of the “snooze” feature, but also has a few shortcomings. One them is the lack of badges to let you know how many unread emails you have. Gmail has a cool feature that shows your unread count in the favicon in your browser, like this:

Google Inbox has no such feature, but Shift does. In fact, Shift gives you a few different badges — the icon running at the bottom of your screen shows your total unread count:

Then each individual tab inside of Shift shows the unread count for that specific email account:

Keep it simple

What I like most about Shift is that it doesn’t try to do too much. I can still use the normal Inbox/Gmail app on my phone, and still use the normal web interfaces when I’m on a Chromebook. This gives me a slightly improved experience on desktop, and I love it.

The basic version is free, and the Pro version (which I use) is just $19.99/year. Give it a shot for yourself at TryShift.com. It’s based on the open-source software Wmail, which is a bit less powerful but is totally free. I’ve been playing with that a bit as well, but either one should work well for you.

Filed Under: Productivity, Technology

  • « Previous Page
  • 1
  • …
  • 22
  • 23
  • 24
  • 25
  • 26
  • …
  • 35
  • Next Page »
mickmel-white
Facebook LinkedIn Feed Youtube

© 2025 Mickey Mellen. All Rights Reserved.
Accessibility Statement | Privacy Policy